Measure twice, cut once - but measure the right things
The single biggest cause of wasted frame mouldings, matboard and cracked glass is confusing measurements. There are a few sizes to be aware of in every frame, and they are never the same number.
- Artwork size: the actual dimensions of the artwork that you see once your print, photo or painting is framed. This is distinct from the size of the page the artwork is painted, drawn or printed on.
- Visible opening: what you see once the mat overlaps the edges of the artwork and sits under the rebate lip.
- Cut sizes: the size of the mat, glass and backing, cut to the frame's rebate opening.
Tip: Write all three down before you cut anything. If you only ever note the artwork size, you'll eventually cut a mat to the wrong dimension.
Understand the rebate before you buy moulding
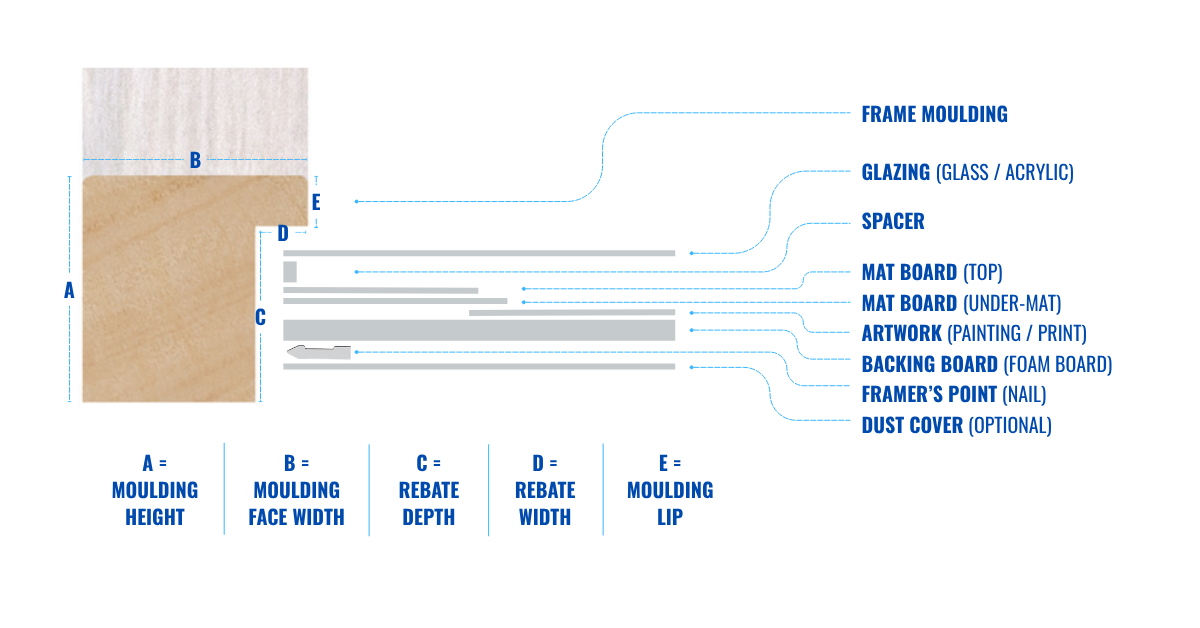
The rebate (also known as rabbet) is the recessed lip at the back of the frame that holds everything in place. Its width determines how much of your mat is hidden behind the frame; its depth determines whether your whole stack - glass, mats, artwork, spacers and backing - physically fits.
A shallow rebate is the reason a chunky canvas or a triple-mat build ends up bulging out the back. Always check the rebate depth against the total depth of your materials.
Tip: If your contents are deeper than the rebate, use less layers (single mat instead of three, or thinner backing board) or choose a deeper moulding - don't force the backing board in under tension.
Build a repeatable workflow
Whether you frame one piece a month or fifty, consistency saves money. Standardise on a few moulding profiles and mat colours, record every job by client or artwork name, and reuse those specs for repeat frame sizes.
A saved calculation you can reload - and a printed cut sheet at the bench - removes the mental maths that leads to expensive slips.
Know your components and stacking layers before cutting
Gather all your components prior to cutting, then start with the frame. Once you've cut and assembled the frame pieces, you can double check your mat, backing and glass cut sizes against your assembled frame before cutting any further.
A little preparation prior will save costly mistakes later.